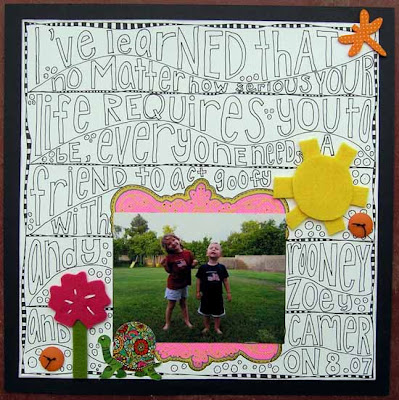
The first thing to do is to set up the background. I started with the border. You can get the directions for that here.
Next, draw the horizontal straight lines. Use a ruler and a pencil to get your spacing. Then you can just freehand the actual line. This makes it look neat, but still like you just did it on a whim.
Then, draw the wavy lines between the horizontal lines.
If you look closely at the lettering, you will see that I mixed upper and lower case, but that each letter extends the entire space. This is the key to coolness.
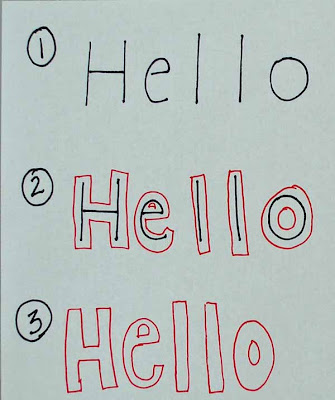
Now, this is how I did the lettering.

1. I took my pencil and lightly wrote my word. Space the letters a bit farther apart than normal. This allows you to do the outlining.
2. Outline the pencil lines (see the red pen.)
3. Erase your pencil lines and voila! You've got your cool word! When you've done this awhile, you will be able to skip the pencil step and just draw outlined letters. That's when it gets really fun (and much faster!)
You can dress up your letters too. Add some stripes or dots or color them in if you'd like. The sky's the limit!
Have fun!

7 comments:
You made this look so easy! Hmmmm....somehow I don't think mine will look the same! ;) I will give it a shot, though!
I love the way you filled the background with the journaling!! Great technique!
Thanks so much for sharing this! I can't wait to give it a try.
Ooo...can't wait to give this a try!
Thank you for sharing! I am going to try this, although I don't think mine will be nearly as cool.
thanks so much for posting this, I can wait to try it
wow - that is just awesome!! i can't wait to try this!
As Lucy said I don't think mine will look as nifty as yours but thanks so much for sharing.
Post a Comment