For some reason some of the pictures grew in size as I uploaded them. I'm sorry about that!
Christmas is a special time of year when JOY, HOPE and PEACE reign. Join with me as we celebrate these wonderful feelings by making a simple wall-hanging using the metal lids from concentrated orange juice containers. This project is not only beautiful, but also symbolic.

With JOY blooms a beautiful white flower.

With HOPE grows holly, one of the only green plants that thrive in the snow.

And PEACE is accompanied by none other than a dove.

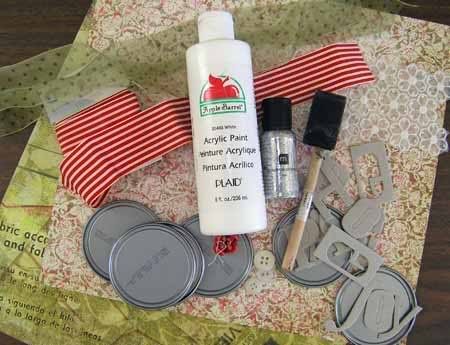
Supply List :
2 12x12 sheets of coordinating pattern paper in Christmas colors
(You will not use the entire sheet)
1 yard of 1½-inch wide ribbon (I used a red and white stripe)
1 yard of 1½-inch wide ribbon (I used a green polka dot)
3 metal concentrated orange juice tops
(They measure a little over 2½-inches in diameter)
1 bottle loose silver glitter (I used Making Memories)
White acrylic paint
1 red vintage button
1 white (about ½ inch wide) flower (I used one from a piece of vintage lace)
Chipboard letters that spell out JOY, PEACE, HOPE (I used Heidi Swapp)
A small bird stamp (about 1 inch long) (I used an Autumn Leaves stamp)
Silver Stickles
3D foam squares (You will be cutting these down)
Red Ink (to stamp your bird)
Brown or Black ink for inking edges of papers (I used Colorbox cat’s eye)
Warning: You will get glitter on your black or brown ink pad. I have not had any adverse effects from this other than a blingy ink pad. If you do not want glitter on your pad, use a piece of craft foam dipped in a dye ink pad like Ranger Distress pads.
Tools
Foam paintbrush
Elmer’s school glue
Tacky glue (a stronger hold than Elmer’s)
Scallop scissors
Regular scissors
1 file folder (to catch stray glitter and pour it back into your bottle)
Sewing machine and white thread (optional)
Fabric glue if you don’t want to use a sewing machine (Test this on a small piece of ribbon to make sure that it doesn’t show through.)
Class Instructions :
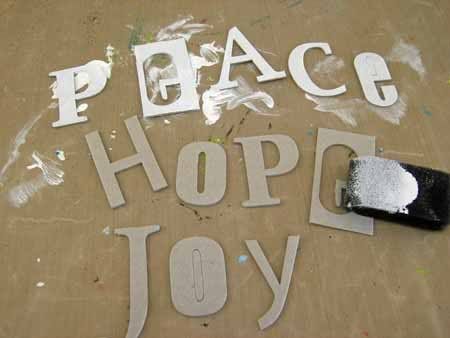
1. Paint the chipboard letters white using acrylic paint and a foam brush. Allow to dry.
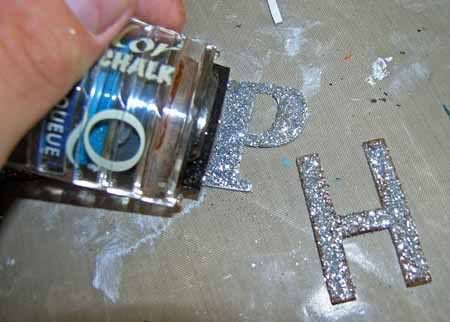
2. Use your finger to spread the Elmer’s glue on the front of each letter. Keep it neat, you don’t want to have blobs coming off of your letters, but use ample glue to adhere the glitter.
TIP: Have a baby wipe handy to clean off your finger as necessary when the phone rings.
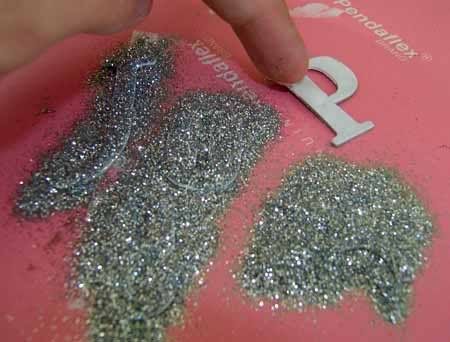
3. Place gluey letters on your file folder and pour glitter on top. Allow letters to dry thoroughly. Overnight is best for impatient scrappers.
TIP: Allow the letters to dry for about 10 minutes before moving them. This will prevent you from removing glitter from the edges of the letters. I glued and glittered my letters in batches. When you have finished glittering, pour the glitter back into its bottle using the folder’s fold as a pour spout.
Apply extra glitter to your face and hair so you can look fancy all day long!
4. Choose which pattern paper you would like inside your metal lids and cut it to fit inside the circle. (On the lids, the side with the rim will be on top.)
TIP: When cutting circles, it is best to use small scissors and very small cuts. This will keep the circle rounded.
5. Using the other pattern paper, cut circles that are about ½ inch bigger than the circles that fit inside the metal lids. Use your scallop scissors to make the edges fancy.
6. Ink the edges of your papers using brown or black ink. (I used brown.)

7. Ink the edges of your glittered and dry letters using the same color ink. WARNING: You will get glitter on this ink pad. I have not had any adverse effects from this other than a blingy ink pad. If you do not want glitter on your pad, use a piece of craft foam dipped in a dye ink pad like Ranger Distress pads.
8. Adhere the inner circle to the metal lid using Elmer’s glue. Smooth out any bubbles. Allow to dry.
9. Adhere the outer circle to the back of the metal lid using Elmer’s glue. Smooth out any bubbles. Allow to dry.
10. Decide how long you would like your wall-hanging to be. Before you cut your ribbon, double that length. Fold the ribbon in half so that the two cut edges are together.
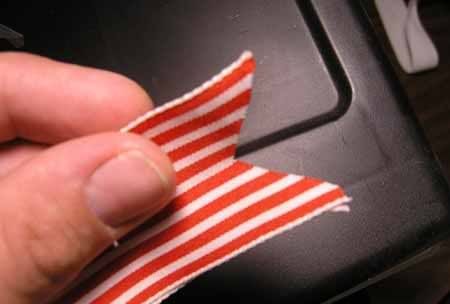
Cut the bottom of the ribbon into a V.
The easiest way to do this is to fold the ribbon lengthwise and make a diagonal cut from the outside of the ribbon to the inside fold. Meaning, the bottom of your scissors should be on the edge of the ribbon and the tip of your scissors should be at the fold. See the picture for clarification.
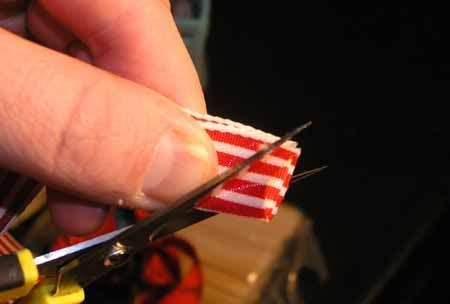
When you have made your cut, the bottom of your ribbon should look like this.
11. Sew the edges of the ribbon together (or glue together). This gives the ribbon more stability to hold those heavy metal lids.
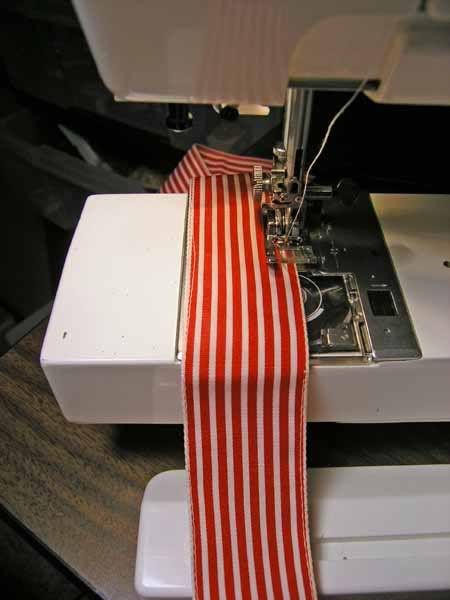
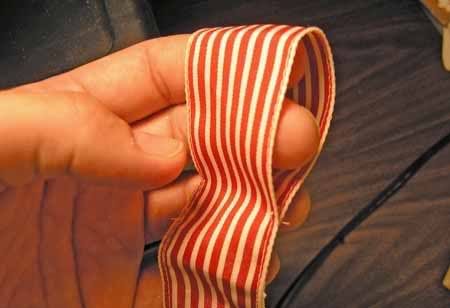
Make sure that you leave an open pocket at the top of the ribbon where the fold lies. This will be used to hang your final piece.
12. Place your letters in a way that is pleasing to you to the front of the metal lid.

Use 3D foam squares to layer them. On some letters, I used 2 pieces of foam on top of each other to get it even higher. On other letters, I simply adhered them using Elmer’s glue.
You can see how each letter is stacked when you look at HOPE on the side.

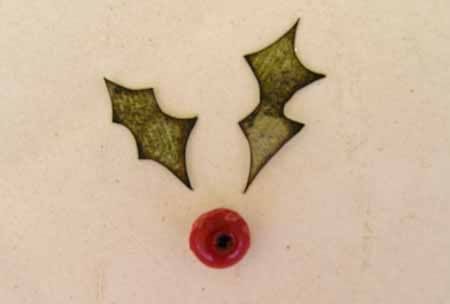
13. Embellish each circle as you desire. Freehand holly leaves and cut them out of your pattern paper. Ink the edges and adhere to HOPE along with your red button, use your white flower on JOY and stamp your bird for PEACE. I stamped the bird with red ink on white cardstock, cut it out, inked the edges, applied silver Stickles to various parts and adhered.
14. Adhere each metal circle to the ribbon using tacky glue. Tie a bow using your second ribbon. Adhere using tacky glue. Allow to dry.
TIP: You may need to apply weight to your ribbon bow to make sure that it says in place while drying.

15. Enjoy your creation!

Other Creative Options
Spell out different words like HAPPY, LOVE, etc.
Spell out one word with larger chipboard letters (MERRY, JOY, etc)
Use a different color glitter on your letters.
Instead of pattern paper, use pictures in each metal circle. You can also add embellies to your pictures and pour diamond glaze over the whole thing.
Use non-traditional Christmas colors like aqua and silver, green and gold, or red and pink.
Go funky instead of vintage.

No comments:
Post a Comment