Wednesday, October 31, 2007
Happy Halloween
Yesterday, we had one of those very busy mornings full of mischief and roaring. So I decided that we needed to go on a grand adventure. We walked (actually I walked and the 3 youngers rode in the wagon) to the canal. We spent the next hour throwing rocks into the water and collecting seashells. It was the most wonderful thing. Mr Moonie was in little boy heaven. He carried enormous boulders and heaved them into the water. He threw handfuls of dirt and pebbles and watched the splashes. He ran along the bridge. He climbed up the mountain. He conquered the world. Toodles collected all the shells she could find, broken or otherwise, placed them in an old water bottle (shame on me for not bringing buckets!) and climbed around getting rocks in her sandals. She was a girl on a mission looking for interesting colors, finding two golf balls and other various treasures. Snukie sat in the wagon guarding the remaining water bottle and enjoying the happy chatter. It was a wonderful end to a tough morning. It was one of those times that I was so fully present in the moment that I felt only joy and love. I like those times.
Monday, October 29, 2007
Techno Lover

Journaling: I still remember life without the Internet, digital cameras and cell phones. But, now that I have all these things, they’ve become such an essential part of my life that I could never live without them again. I love technology. 10.25.07
Techniques: Dry embossing on sheet metal, using sheet metal as background paper. Painting over dry embossing, altering photographs using paint and stamps
Cardstock: Bazzil; Pattern paper: pages ripped out of an old book; Stamps: Inque Boutique: What a feeling, phantoms, encircled; Chipboard: Heidi Swapp alphabet and heart; Ink: Staz-on black; Other: Sheet metal: EK Success; acrylic paint, Ranger red pepper dabber, stylus, glue arts micro dots
To do the journaling and star border, I took the black pad that comes with Inque Boutique Stamps and placed it under my metal. I used a stylus (which is like a metal pencil with a small immovable ball on top) and wrote my journaling and made stars. Then I took black acrylic paint and painted over the journaling. Before the paint dried, I wiped off the excess paint on the surface of the metal and left the paint in the grooves of my writing. Do not use a baby wipe because it will take all the paint off. Use a dry paper towel. I did the same thing for the stars only with red paint. When I completed this, I adhered the sheet metal to a sheet of cardstock so that it would have a bit more stability.
To alter my photos, I printed them out on my home printer. I worked with one photo at a time until I got to the painting part, then I did them all at once. Soak your photo in warm water face down for 30 seconds. I noticed that some red dye oozed from the photo, but it didn't seem to do any harm so I didn't sweat it. Dry the photo with a paper towel then using a fine grade sandpaper, sand the spots that you want to paint. I sanded around the actual image, as you can see. After I did all of this nap time was over ending my creative time, so I left my photos to dry. When I came back in the evening, I sprayed the photos with a fine mist and used green, yellow and a bit of red acrylic paint. I put on some paint, wiped some off, sprayed more water and fiddled until I liked how it looked. When the paint dried, I got out my Inque stamps and used StazOn and stamped my heart out. This part was really fun. When finished, I adhered the photos to a few sheets of text that I ripped out of an old book and adhered that to my sheet metal using my normal hermafix adhesive.
I used chipboard for my title, I painted it black using acrylic and distressed the edges using a file and sandpaper. I wanted the distressed title to be a bit of a justoposition to the more modern feel of the rest of the layout.
I hope that you enjoy these techniques!
Acetate 101
I purchase 8.5x11 transparencies in bulk at office supply stores. Look for the kind that is made for your printer. Since I have an inkjet, the transparencies I purchase have a smooth side and a rough side. You’ll print on the rough side so that the ink magically soaks in. I follow the drying time religiously (15 minutes) so I’ve never had problems with smearing. Since each sheet costs around a dollar, I use every scrap.
What I like to do is print out a photo on a transparency, cut it out and adhere it to my project. I’ve done this in Bloom Where You’re Planted and Sometimes in the midst of my joy my heart aches for the sadness of the world.


I like the ethereal quality of an acetate photo and I love that my background shows through. You can capitalize on this quality by painting the background before you adhere your photo or place the photo on colored paper.
Adhesion
My experimentation has lead be to conclude that there are two main products for adhering acetate. Each has its own strengths. You can use an acid free spray adhesive or Glue Arts new vellum adhesive. A spray adhesive binds permanently and dries clear, but it is messy to use and once you place your photo down, you cannot move it. On the other hand, Glue Arts adhesive comes in a sheet. You place what you want to adhere to the sheet, rubbing to transfer the glue. Then you adhere to your project. This product is clean, dries clear and can be repositioned. I like that quality. For projects that are smaller or the same size as the sheet of glue, I will definitely use Glue Arts. However, if you have a photo that is larger than the adhesive sheet, like I did when I tried to adhere a Hambly frame to a photo, I found that the glue showed through (only at certain angles) where there was either overlap or where the glue folded over on itself.
Using Scraps
I use my acetate scraps for various projects. For example, if you are nervous about writing on photos, write on your scraps first then adhere that to your photo. However, my main use for the scraps is in stamping. I use StazOn ink because it dries almost instantly. What I like to do is stamp on a scrap of acetate, cut it out and adhere to my project. This is particularly helpful when I:
1. Only want to use a section of the stamp like I did in Bloom Where You’re Planted. The stamp that I had for the wings was actually a Stamping Up! dragonfly. I inked using StazOn, stamped the entire stamp then cut out the dragonfly body and only used the wings.
2. Want exact placement of a wood mounted rubber stamp. I never got the hang of the stamp positioner tool so this technique really helps. I stamp onto acetate, cut it out and place it where I want. This allows me to fiddle with placement, which I do frequently. Plus, if you have a problem stamp that doesn’t always come out well, you have a buffer. Or if you often get corners because you are too vigorous in your inking, this will allow you to stamp then cut out imperfections before placing.
Advanced Techniques
You can easily paint on acetate. I’ve painted both on the back and on the front. Right now, I prefer painting on the front. Acrylic dries beautifully and adds great dimension. I’ve also used Sharpie paint pens with great success. I just started a mini album in which I used my children’s artwork as a base for my creative experimentation. I printed their sketches onto a transparency, adhered to my mini album, painted on makeup and glued on clothing.
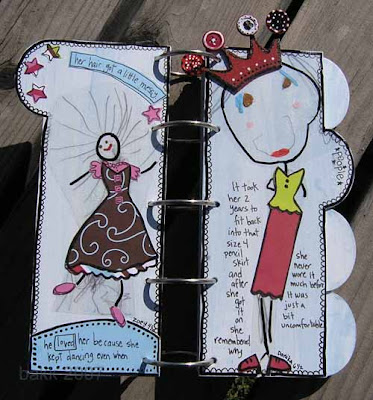 Journaling on left: He loved her because she kept dancing even when her hair got a little messy. Artwork by Toodles (age 4)
Journaling on right: It took her 2 years to fit back into that size 4 pencil skirt and after she got it on she remembered why she never wore it much before. It was just a bit uncomfortable.
Artwork by Sweetpea (age 6)
I’ve also used a glue pad (like an ink pad, only with glue) by Tsukinko and adhered art glitter. I did this on Heidi Swapp ghost letters (which are like thick acetate) in Sometimes… see above.
If you don’t have a glue pad, you can use a small paintbrush and some PVA glue. This is used in bookbinding and is acid free and dries clear. (TIP: Don’t use one of your best paint brushes because the glue is tough to get out.) Brush the glue on the stamp then stamp your paper, and sprinkle on glitter. (TIP: Clean that stamp quickly) Or, use the glue like paint and paint it on the surface and sprinkle with glitter. (TIP: When you are using glitter, place a file folder under your project to catch loose glitter and slide it back into your container. And turn off all your fans, for obvious reasons.)
Don’t forget about all those wonderful overlays that are out there either! I used a Hambly overlay for Little Curls. I adhered My mind’s eye paper using diamond glaze to the back of the transparency so that the pattern would show through. However, I would try Glue Arts vellum adhesive the next time because the diamond glaze warped the overlay a little. The photos were placed on the front so they took center stage. The result is a soft and beautiful look.
Also, don’t forget that you can sew and staple on acetate too. (TIP: Before I sew I like to adhere the acetate so that I don’t have any moving objects under my machine.)
I challenge you to experiment with this medium and when you do, let me know, I’d love to hear all about it!
Friday, October 26, 2007
Halloween Costumes
My second most memorable costume was never fully defined. It was a princess/fancy lady. I borrowed an old bride's maid dress from my neighbor across the street. It was taffeta and peach and long and a bit revealing in the front (to a 10 year old.) I believe puffy sleeves were involved and it was BEAUTIFUL. I looked like a beauty lady in it. Because the front was a bit low cut (it went lower than a turtleneck) I needed a special shawl to cover myself. So my mom found a lacy shower curtain that worked perfectly. As I write this I cannot believe that I combined a shower curtain, even if it was of creamy lace, with a fancy dress, but as always, I was not aware of the fashion gauche that I was committing (and still commit even today, but not with dresses and shower curtains.) All the neighbors thought that I looked just like Princess Diana (she was just getting famous at the time.) and I was more than pleased to be compared to such a lovely person. I loved that dress and I cried when I had to return it months after Christmas. Moreover, I'll forever remember that wondrous feeling of being greatly admired by the masses as I walked around in my puffy-sleeved, peach dress with accompanying shower curtain shawl.
Monday, October 22, 2007
This Month's Layouts
The first is Dakota, I did this one in an ad challenge for Scrapbook Heaven. I stiched around Dakota and around all the photos. It seemed to ground everything better. The journaling states: Dane and Dakota are best friends. It is a very sweet relationship. And I too love Dakota because she carries a piece of my brother with her.

I did Swim Class for a Becky Fleck sketch challenge for this weekend's crop at Scrap Shanty. I love how it turned out. She is an amazing sketcher. If, like me, you find sketches inspirational, you must go to Scrap Shanty and see her work.

Becky Fleck sketch
Cardstock: Bazzil
Pattern paper: Imagination project: As you wish and office supplied, Foof-a-La capri
Stickers: Scenic Route alpha
Ink: colorbox maroon chalk, walnut ink ranger,
Pens: micron
Buttons: bazzil brads
Ribbon: unknown
Other: walnut ink tintz (on ribbon), glue arts strip adhesive, thread
Sweet Girl was done using Glue Arts products. They are our sponsor at Scrap Shanty this month and I am just in love with their adhesives! I also used Inque Boutique stamps. I had a lot of fun with this one!
 Journaling: This was one of my grandmother’s favorite photos of my mother. MA 1952
Techniques: sewing; stamping on ribbon with Staz-on ink; heat embossing
Cardstock: Gold Leaf Bazzil
Pattern paper: Basic Grey (scarlet’s letter desire)
Specialty paper: vellum from Michaels
Stamps: Inque Boutique (what a feeling)
Stickers: Scenic Route Alpha
Ink: Colorbox dark brown, Colorbox off-white; Ranger walnut stain, tea dye and antique linen; StazOn timber brown
Pens: micron
Buttons: Imaginisce corduroy brads; buttons from old shirt
Ribbon: unknown
Other: Glue Arts vellum adhesive, micro squares, lines and squares; Heidi Swapp journaling spots; Fancy Pants large creative cards; Cosmo Cricket alpha buttons; thread; embroidery floss; prima flower; Judikins Egyptian gold embossing powder, acrylic paint
I just finished this one last night. On Saturday morning some friends and I ran our first 5K. (I think this may become a new obsession.) I didn't have any photos, but I wanted to scrap the memory so I used my little sign as a photo. I did the journaling with Inque Boutique stamps. I heat embossed them. Painted over and wiped the paint off with baby wipes so that the journaling would show through. If you do this, have a bunch of wipes ready. I went through about 10 on this. Plus, watch your painty hands. I smudged a bit on my white paper. Luckily, I was able to cover it up with the sign. And don't drop your paint brush on your carpet. That can't be covered with a sign. (I take no responsibility for the messes made while doing this technique.) The arrows are a mix of 7 Gypsies rub-ons and my own doodling and coloring. I'm not totally loving this layout, but I like the new techniques that I tried on it. However, I know that I'm not a very good judge of my own work so perhaps it turned out better than I think.

Journaling: I was so nervous that I almost didn’t go. At the last minute I decided to run my 1st 5K. 31 min 21 sec. Not bad. I guess I was so busy I forgot I’m an athlete.
Techniques: Painting over embossed text. Doodling with rubons
Cardstock: Bazzil
Stamps: Inque Boutique alpha
Ink: Colorbox orange
Pens: Zig
Rub-ons: 7 Gypsies Other: Personal Stamp Exchange red embossing powder, acrylic paint
Hopefully, I'll have more to share in a few days!
Saturday, October 20, 2007
Instant Tips for Better Photos
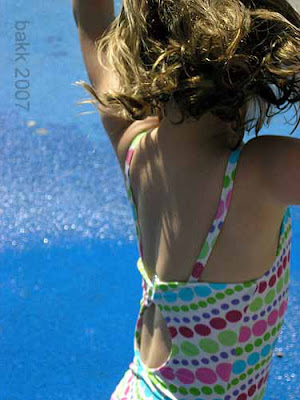
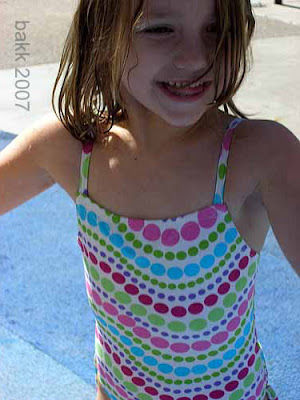
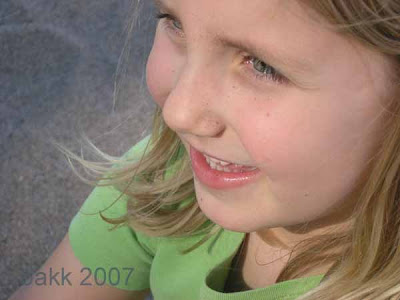
In these shots, I'm trying to capture happiness not the scene at the park. So I zoomed in on their faces only.

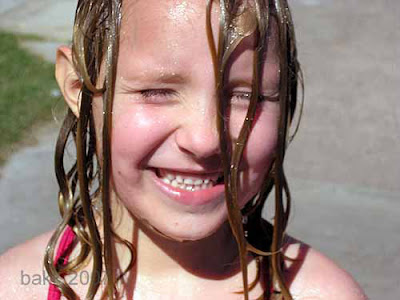
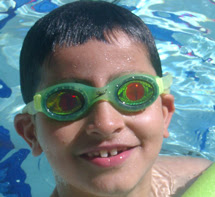
Here I was trying to capture those hilarious goggles. So I zoomed in on the face, while still maintaining a bit of the water in the background so everyone would know we were in the pool and that my brother isn't really a lizard of some sort.
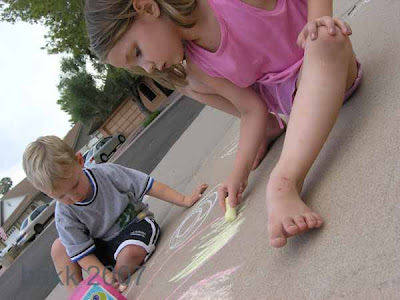
 Or, here I am lying on the ground, tilting my camera for the artsy shot.
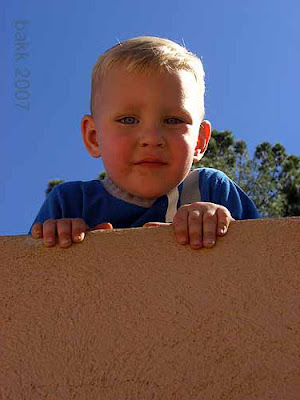
On this one, I am under my 2 year old, looking up.
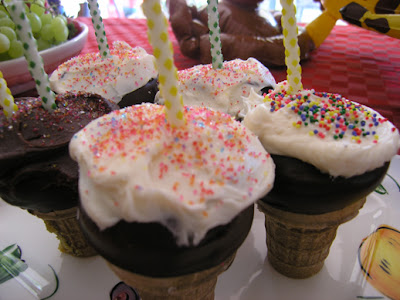
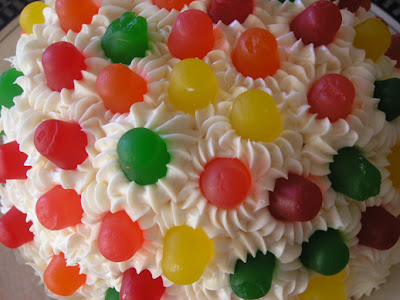
4. Sometimes less is more. Try shooting just a part of an object like I did below for my daughter’s cakes. This technique doesn’t work for everything, but sometimes just a chunk of your subject is a neat photo.
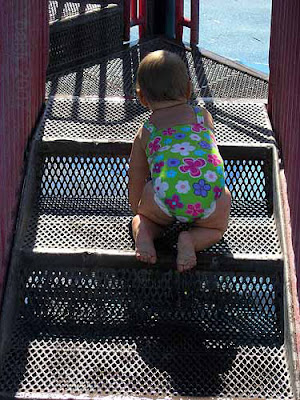
5. Sometimes a frame is nice. Step back and capture that tree on the side or take a photo between arches and see what happens. Here I framed my 10 month old with the railings of the stairs.
6. Lighting is important. My favorite shots are usually outside. However, I know that there are times that I must make do with an imperfect environment. But I can make the most of my situation. For example, I know that when I take a photo inside, facing a window, the subject will look dark so I try to position myself so that my back is to the window. I also know that upstairs in my daughter’s room is a great window with awesome light so I often shoot there. My friend set up a photo shoot in her garage with an old white sheet. The results were amazing. Use what you have.
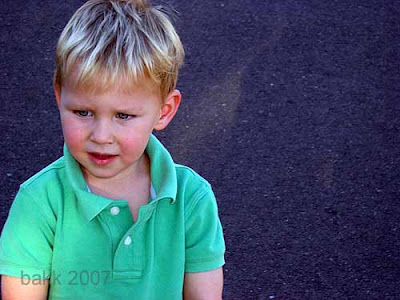
7. Think in thirds. When you are composing your shot, mentally divide the possible photo into three equal sections. Instead of always taking dead-center photos, try placing your focal point in one of your three sections. See below for examples.

8. Before you click, look for any very distracting elements like a pole shooting up from someone’s head or a dead cockroach in the foreground. You get the idea.
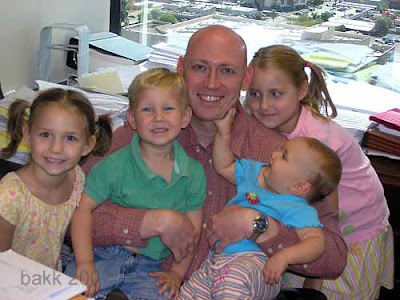
My husband's office was filled with distracting paper stacks so to avoid them, I tried to get a bit closer. This wasn't an ideal environment, but the photo turned out pretty well considering two out of four children aren't looking at the camera.
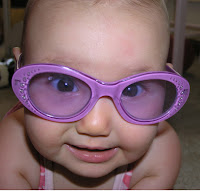
- 8. Keep your camera accessible. And take that shot when you think of it, you may not get another chance. My baby only wore these glasses for about 17.6 seconds. Luckily, I got my camera in time!
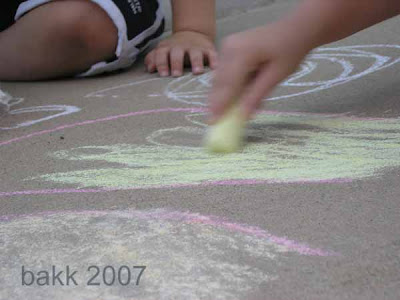
9. Details, details, details. Don’t forget to capture those small daily details. You know, the pile of laundry, the little Matchbox cars lined up in a traffic jam, the makeup on the sink. (Yes, I did get some photos of those stacks of paper in my husband's office.) Those small details often make the best pages. Recently, I was looking at my 2-year-old son’s small shoes and trying to imagine them in 15 years. I took a photo of his shoes (again, the neighbors thought I was crazy) and I plan to scrap that photo with journaling about him growing up.
10. Remember that sometimes someone’s terrible photo is someone else’s treasure. If you do take a bad shot, make the most of it and scrap it anyway. Sometimes those shots that break all the rules (as in heads cut off or bizarre backgrounds) turn out to be my favorites and my creative muscles are strengthened as I scrap them.
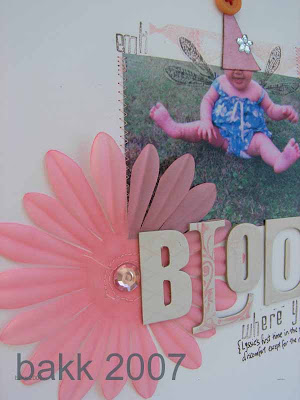
You're going to get sick of seeing this layout, but if you'll look closely, you'll see that my daughter's head is completely cut off. By the rules, this shot should be tossed, but I loved it anyway because her smile and legs are still visible so I stuck a hat on her, gave her some wings and used it anyway. This is still one of my favorite creations.
 Of course, this list is far from exhaustive, but it certainly gives you a starting point. If you apply any of these tips, your photography will instantly improve. And remember, with practice, you’ll start to apply these tips automatically and it won’t take so much thought. Good luck and happy shooting!
Thursday, October 18, 2007
Crop at the Scrap Shanty
Tuesday, October 16, 2007
End of School Year Synopsis

 This year, I handled Toodles's work a bit differently because she is still in preschool. I won't start her School Days album until she's in kindergarten, but this could easily change with the other children when I get busier. So here is a photo of her last-day-of-school ceremony. As you can see, I incorporated her report card and various projects.
 Now, to get a bit technical. When I scan my images, I save them in a folder devoted to each child's year in school. Then I fiddle with the colors to make sure than my scan is accurate. When I print the image out, I do so in a 2x3 size so that I can fit more photos onto a page. However, I usually make something like a report card 3x5 so that I can read it. After I've scanned all my images, I toss the original and once I've printed out all my photos, I delete the folder. I know that this could later be a problem, but with all the sweet babies I have, I need to simplify.
However, at times, a very special project merits an layout. So I'm not adverse to breaking the rules. In fact, I just found a bit of staff paper upon which Sweetpea composed her first song, so of course, that will be part of a layout devoted to her love of piano. And I think that Toodles's recent picture of our family will be in a layout because she has Big Man in a bow tie and that, is precious.
I also have an album that I started as part of my design position on Scrapbook Circle in which I experimented with using my children's sketches as the basis for playful paper doll doodling. I'm not sure what the technical name would be for this technique since I believe it is all new. So if you have a better title, please leave me a comment! My directions will be posted on the Scrapbook Circle blog, so please go there if you'd like specifics. Here is a photo of the cover.

And the first two pages. The journaling on the left states: He loved her because she kept dancing even when her hair got a little messy. The journaling on the right states: It took her two years to fit back into that size 4 pencil skirt and after she got it on she remembered why she never wore it much before. It was just a bit uncomfortable. I know that the crown's position is inconvenient, but artistically, it just didn't work on the other side so I sacrificed beauty for practicality in this little album. (As I do most Sundays when I wear 3 inch heels while chasing Snukie around.)


Monday, October 15, 2007
Children's Artwork Books
After a bit of thought and a bit of research, I came up with a solution to the stacks of precious papers. I saw an idea for an artwork/schoolwork organizer in Simple Scrapbooks magazine and I decided to use it. Here is a photo of the finished product.

The system is composed of ten 10x14 envelopes (one envelope for each month of the school year.) The covers are made of foam core. I purchased the Elmer's brand with a grid printed on one side so it was easier to measure. Each cover measures about 11x15. I used a steak knife to cut and it turned out that one large board yields two entire covers. Since I purchased a pack of two boards, and I needed six covers, I taped chunks together to make the last two covers. The result was a bit rough, but it turned out alright.
I decorated the foam board with DCWV paper, ribbon from my stash, and buttons. I used 6 total sheets of 12x12 paper: 3 different patterns. I glued the paper down using PVA glue and I made sure that I had enough paper that I could wrap it around the sides. To cover the loose ends on the inside, I glued another sheet to the inside. I used the Heidi Swapp outline mask and acrylic paint for the title. And in the spots where I had trouble, I covered my little gaffes with 7 Gypsies gaffer tape. To put everything together, I punched two holes in both the envelopes and the covers and threaded some ribbon through. I just marked my two spots on the decorated covers with a pencil, used a hand drill (not really necessary, a pencil would work) to make a hole and used that as a guide for the envelopes. Even though I omitted the measuring step, it turned out great. Just make sure that you leave enough room when tying your ribbon. You'll want to be able to open the book. Here is a photo of the inside.

I used Making Memories foam stamps and acrylic paint to mark the month on each envelope. I got a bit distracted at one point and stamped April on two envelopes so I just cut a piece of white cardstock, stamped the correct month on it and glued it over my mistake. If I did the project over again, I would stamp the month on the envelope before I assembled the book because I found it a tad tedious to wait for the paint to dry.
So now, I when I get a special paper, I just put it in the appropriate envelope in the appropriate book and forget about it until the end of the school year when I can go through everything and decide what to scan and what to recycle. Which brings me to what I do with the scanned artwork and how I scrap it. But, that is another topic for tomorrow.
Friday, October 12, 2007
I'm Walking on Sunshine
- I just found out this morning that I am a new Design Team member at Scrap Shanty! So excited! Yeah!
- I have started a new mini-album project involving a band aid tin that I am already loving. I'm using a kit that I purchased from Scrapbook Circle so it is coming together beautifully.
- I'm entertaining a friend that I haven't seen in years tonight and I am thrilled to see her and her girls again.
- My brother is coming over for dinner so I can't wait to see him again too.
- My floor is clean (because of #3 and #4) and that is always nice.
- The kids and I had a wonderful time playing at the water park this morning until Sweetpea stepped on a stick and got a nasty splinter. For a few minutes we thought that it might have been a bee sting, but it wasn't.
- I know that you are wondering why I put the whole bee sting/splinter incident in, but I did because it reminds me of the last time I was stung by a bee walking home in college. The dumb-bunny-bee flew up my skirt and stung me on the fanny. (I don't normally use that word, but it evokes giggles.) And I was at a loss about what to do. Do I scream, run around in a circle and hit myself on the fanny? Do I cry? Do I just continue like nothing ever happened? I chose the latter. But the whole memory makes me snicker almost uncontrollably. Me, trying to be oh-so-very proper, while this idiot bee is flying where flight is strictly prohibited by law.
- Toodles is currently in Snukie's crib (Snukie is supposed to be napping and Toodles is supposed to be playing quietly with Sweetpea) yelling continuously at the top of her lungs, "it is NAP TIME, lie down and sleep!" while Snukie is giggling and pulling her hair. Just for your reference, this would normally make me a tad frustrated, but not today!
Wednesday, October 10, 2007
Halloween Inspiration Volume II

 And I was totally inspired by Elsie Flannigan's skeletons last year so I bought up all the discounted Provo Craft wood skeletons at Michaels and made a few of these beautiful ballerinas. Many of them have found apartments around the country, but here are two that still live at home.
 My mom had the great idea of tying a fuzzy yarn around her neck to she'd be warm in the freezing cold Chicago Halloween. My Arizona babies will be fine without such climatic precautions, however.
 Halloween Inspiration Volume I

I got this "rule" from a list of Halloween Rules that Paper Crafts magazine published a few years ago. Since these are perfect for this time of year, here are a few more.
When it appears that you have killed the monster, never check to see if it's really dead.
If you find that your house is built upon or near a cemetery, was once a church that was used for black masses, had previous inhabitants who went mad or committed suicide or died in some horrible fashion, or had inhabitants who performed satanic practices in your house -- move away immediately.
Do not search the basement, especially if the power has just gone out.
Never read a book of demon summoning aloud, even as a joke.
When you have the benefit of numbers, never pair off and go it alone.
As a general rule, don't solve puzzles that open portals to hell.
If appliances start operating by themselves, move out.
Do not take anything from the dead.
If you're searching for something which caused a noise and find out that it's just the cat, leave the room immediately if you value your life.
Let me know if you were able to use some of these in your projects!
Monday, October 8, 2007
Don't quit
"The sweetest rewards often come after the greatest temptation to quit."
How true this is. Oftentimes, I think that we are tested before we achieve success to make sure that we are:
1. ready for it and
2. willing to do what it takes to get it.
I believe that when much is given, much is required, so we need to prove ourselves ready to give before we can receive. We need to plod through the failures in order to achieve greatness.
Of course, we all have examples of that natural athlete in school who could perform feats of magic on the field without really trying, but those natural athletes don't amount to much unless they are companions with hard work. Because I'm originally from Chicago, Michael Jordan comes to mind. He was certainly a natural, but he combined that raw talent with a whole lot of hard work. He was the first and the last on the court. He practiced over and over and over again. And he also failed. "I missed more than 9,000 shots in my career. I've lost almost 300 games, 26 times I've been trusted to take the game winning shot and missed. I've failed over and over and over again in my life. And that is why I succeed." (Michael Jordan) What I find interesting is that we don't remember those 26 times that he missed the game winning shot. We only remember those beautiful shots that swished at the buzzer. And so it is in our own lives. Others don't usually remember the times we've failed. (Of course, we think that everyone does.) They remember the success. Another example that struck me recently is CD Muckosky. She applied to be in the CK Hall of Fame and was rejected. She submitted layouts to be published and was denied. Then she applied to Scrapbooker of the Year and won. She never quit.
So if your heart tells you to keep going, but the temptation to quit is great, just keep putting one foot in front of the other. Don't quit. Success will come. I know it.
Here is a recent layout I did on this subject.

And a closeup so you can maybe read the journaling.

Saturday, October 6, 2007
Unhurried Creativity
I used to be a very quick artist. I would rush through a layout and use whatever materials I had on hand even if they weren't exactly right for the project. I focused so much on the process of completion that I skipped completely over the process of creation. I worked this way for many, many years. Yes, I was caught up, but I was dissatisfied. I felt frustrated with how my layouts turned out. I would see potential, but I knew that it was never realized. Then I read a post by Alicia Paulson and various posts by Ali Edwards and I evolved. I began focusing on the creation and worrying less about the completion. And you know what? For the first time, I started loving my art. My projects started taking a life of their own and they started communicating with me.
 While others like In her Eyes take me days of tinkering.
 And still others like Sometimes in the Midst of my Joy my Heart Aches for the Sadness of the World are the result of weeks of thought.
Friday, October 5, 2007
Oh, yeah, that's right.
I was full of energy and a certain naive enthusiasm that comes from visiting clean homes. Right after cleaning and washing all the lunch dishes, I carried Snukie upstairs and got all the Halloween decor out of the closet. I enlisted Toodles and Mr. Moonie's help in carrying everything downstairs. Toodles carried down a stuffed witch and a pillow. Mr. Moonie carried a sparkly pink pumpkin down. Then their enthusiasm wained. They decided to help decorate by rearranging all the DVDs. They took out about 25 and placed them in various special places in the living room, the kitchen, and the play area. Snukie decided that the stairs was much more interesting than the cup that I gave her, so she climbed them as soon as my eyes were diverted. I was not to be distracted from my quest, however. I finished getting all the stuff out and decorated the mantle with children's artwork and the table with a white tablecloth. Snukie saw the tablecloth and immediately pulled it down along with my centerpiece that had lost most of its glitter due to the rubbing and licking that the other two bestowed upon it. Then I put a small Halloween tree up on a small bookshelf in the landing. That was when I just happened to glance at my art table. And I noticed that my mini album needed a black border so I sat down for just a minute, okay, maybe five minutes. The phone rang, it was my sister-in-law. While I chatted with her, I cleaned up various toys. I walked into Toodles's room to put some clothes away and found the little Halloween tree, that I had so lovingly placed on the bookshelf, smooshed on the floor with all the ornaments scattered around it. I picked it up and put it back with the ornaments not-so-lovingly-placed on it, saved Snukie from death-by-stairs, shooed the others away from the now-less-glittered pumpkins and got in the car to pick up Sweetpea from school.
Today, the tablecloth is waiting for me to wash and bleach it so that the chocolate milk stains from dinner can be removed. The used-to-be-glittery pumpkins are sitting on the counter on top of the pile of school papers that Sweetpea brought home. The little tree is a bit crooked and its ornaments all hang from the same branch, the stuffed witch is looking a bit scarier with her frizzy hair falling out and the mantle is perfect. I finished the mini-album that I was working on and the DVDs were reorganized by Big Man last night. My enthusiasm for cleaning has dissipated like a puddle in the middle of an Arizona summer so I spent the morning working in the yard.
And now I remember why I don't live in an organized home with sparkly beads hanging from the ceiling, tablecloths and centerpieces on the table, and ceramic figurines displayed on shelves. And I'm okay with that because I live in a special home where things magically disappear and reappear like the staircases in Hogwarts and where there is fairy dust scattered all over the kitchen and where DVDs are arranged like families. And I like it that way.
Thursday, October 4, 2007
Weakness into Strengths
 Of course, I added some more papers to the mix and because I have a special love for circles lately, I did this one with a circle wave.
 I didn't do any machine sewing or special techniques on these, I just created quickly. I think that I did about 6 cards in about 45 minutes. However, I did do a bit extra on the card below. I took a piece of felt left over from another project and transformed it into a button card. The metal "thread" is from a tag taken from a pair of shoes that I purchased. Some doodling around the edges finished it up.
I highly suggest this exercise. Making cards is a quick and small way to practice your skills and your card recipients will be thrilled to receive them! And then when you have more confidence, you can move on to bigger projects. Here is a photo of a layout that I did for Scrapbook Circle using my newly acquired layering skills.
 It turned out a lot better because of my mini practice cards. So, this week, access your art, choose a weakness and work on it. Let me know what happens. I'd love to hear.

